Getting Started with EuroScope
Download Euroscope
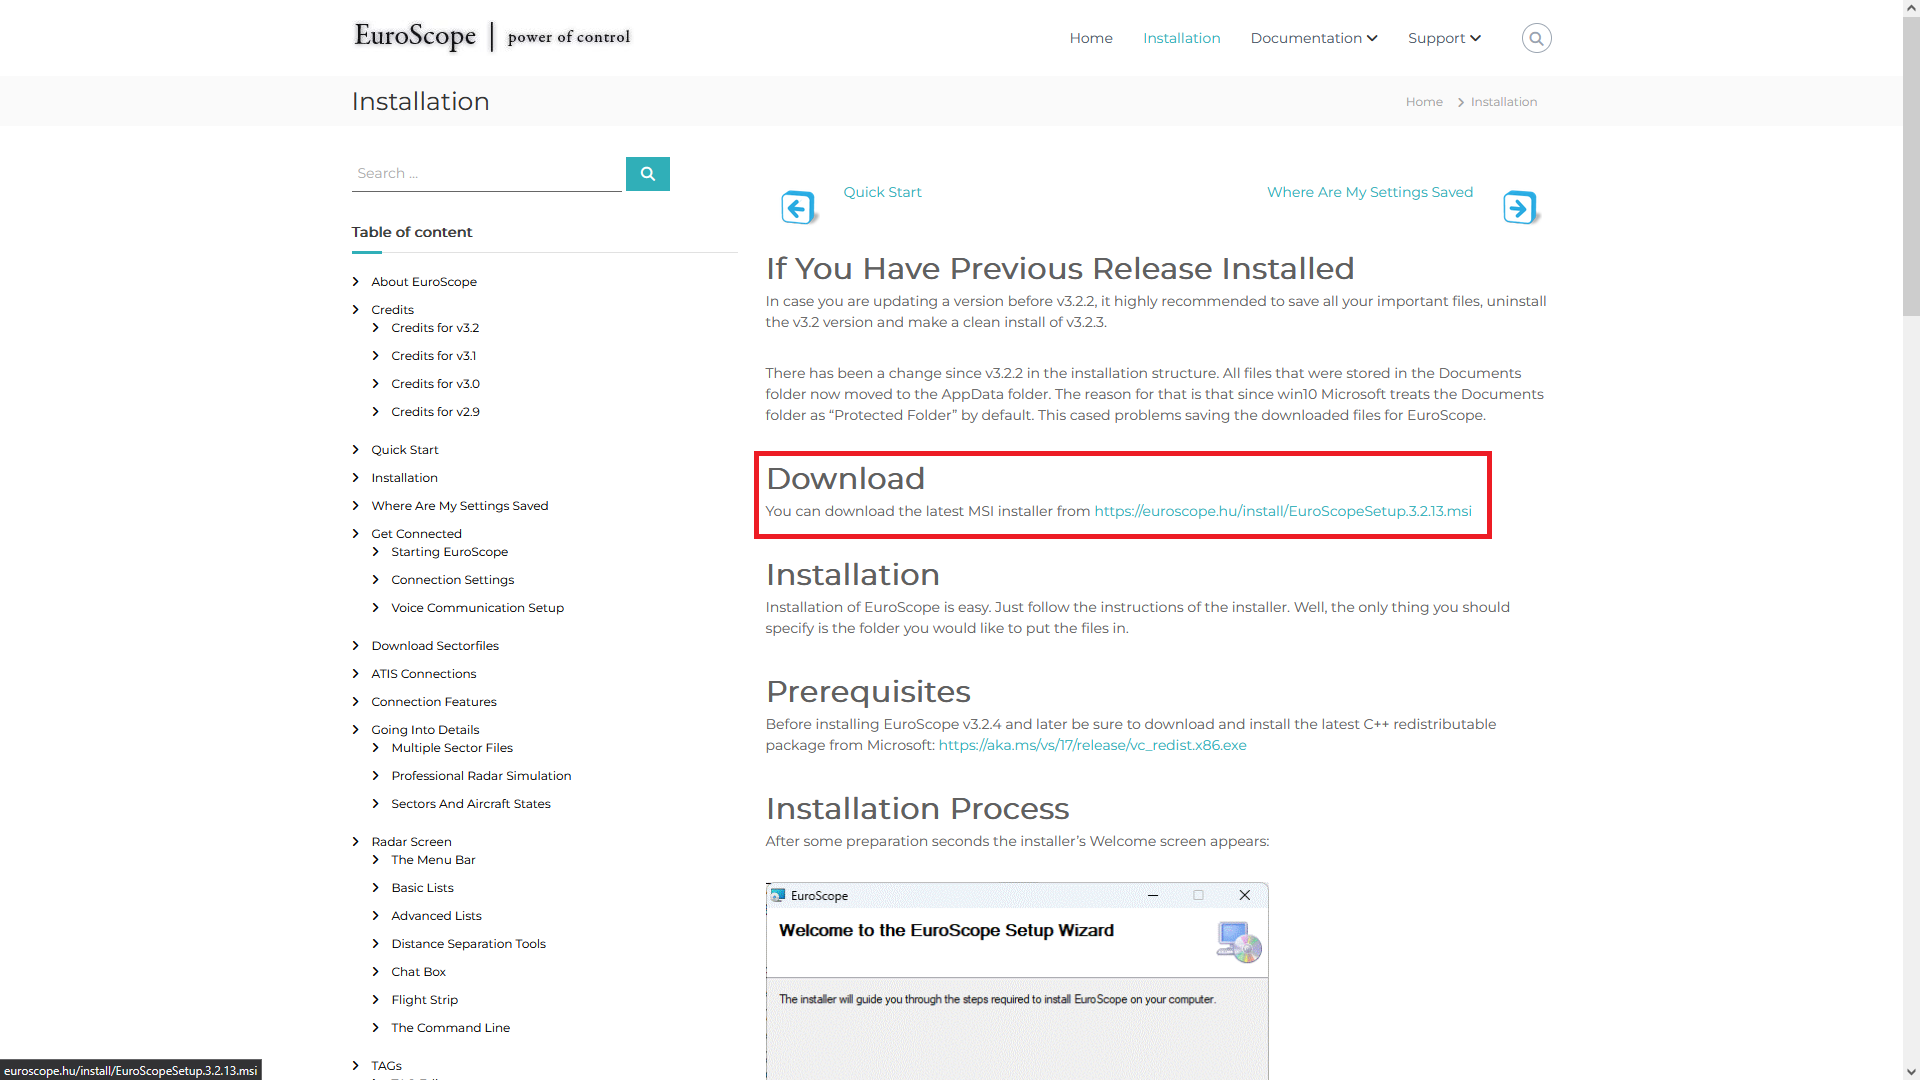
Download the latest MSI installer from:
https://www.euroscope.hu/wp/installation
Prerequisites (MUST Have)
Before installing v3.2.4 and later, download and install the latest C++ redistributable package:
https://aka.ms/vs/17/release/vc_redist.x86.exe
Install Euroscope
Installation is straightforward, just follow the installer instructions. You only need to specify the installation folder.
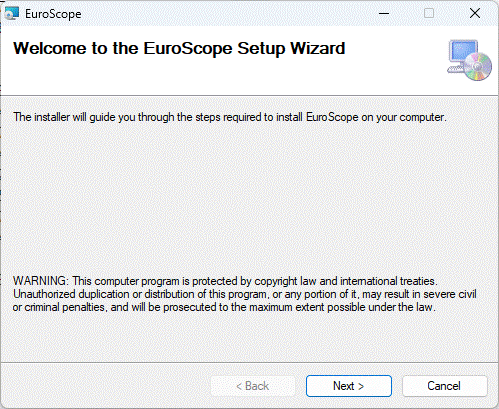
- After preparation, the installer's Welcome screen appears. Press Next.
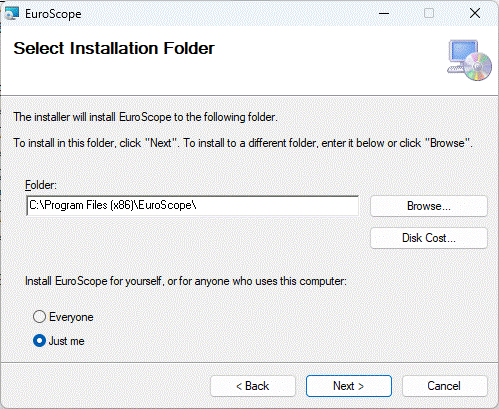
- Select the folder where you want to install EuroScope. Press Next.
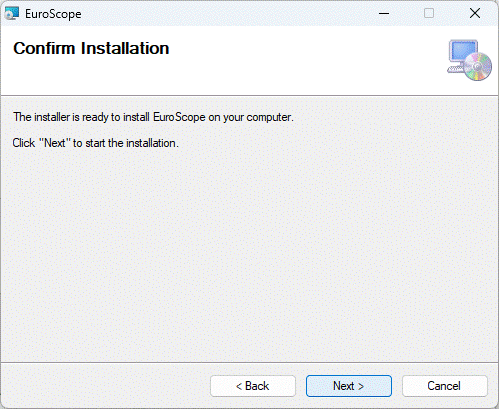
- Confirm the installation on the final screen. Press Next.
- The installation will proceed automatically. If prompted, allow the installer to modify your system.
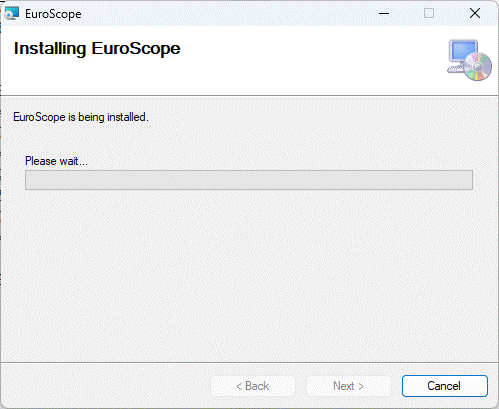
- Wait for the progress bar to complete (it may seem frozen at times—be patient).
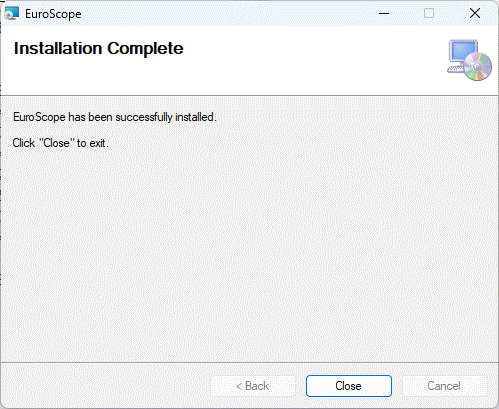
- Press Close when finished.
Connect to the Network
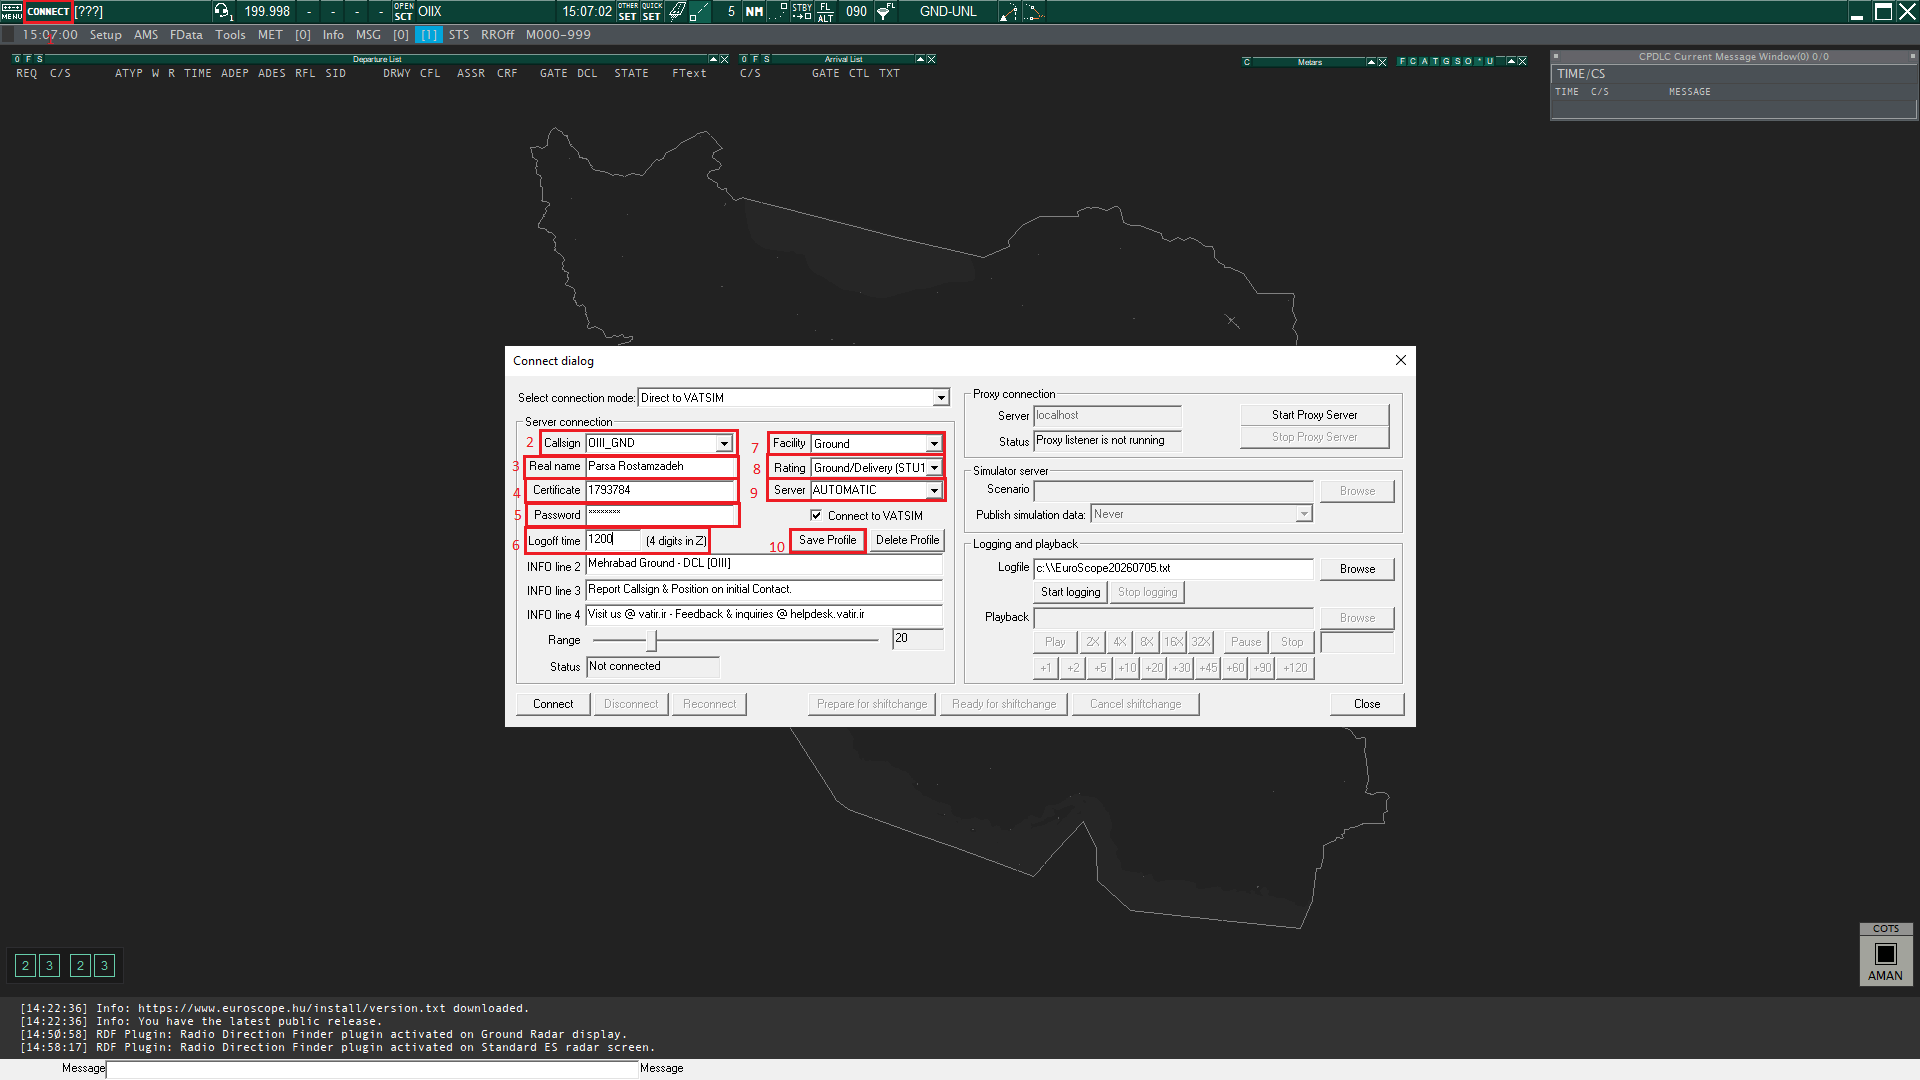
- Click CONNECT in the top-left corner.
-
Enter your Callsign:
(For observers: use your first initial + last name +
_OBS(e.g.,JA_OBSfor John Alice)) -
Fill in your Real name.
- Enter your CID in the
Certificatefield. - Enter your Password.
- (Optional) Enter your logoff time.
- Select your Facility (Observers select
Observer). - Select your Rating (Observers select
Observer). - Set Server to
AUTOMATIC. - Click Save Profile to save your credentials for next time.
Activate a Runway
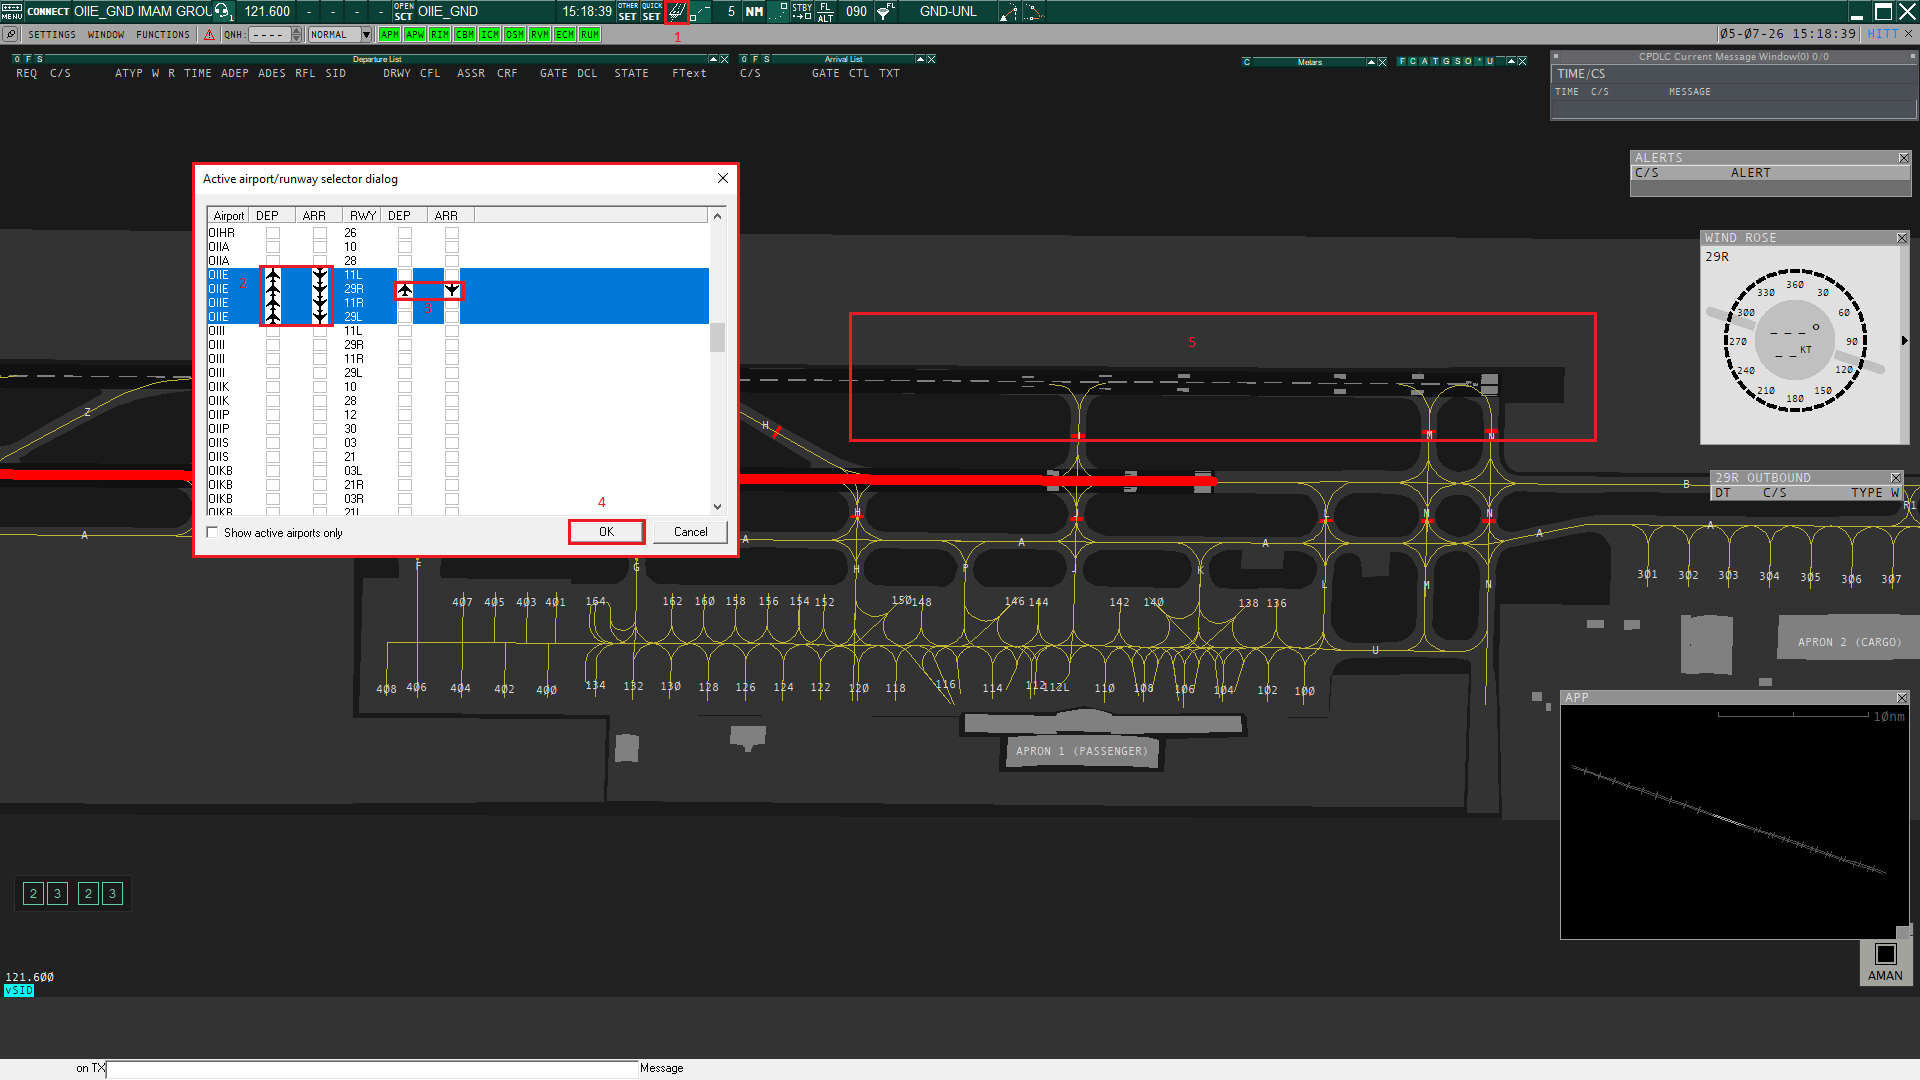
- Click the Runway icon in the top-right corner.
- Find your airport.
- Click DEP for departure runway or ARR for arrival runway.
- Click OK to close.
- The red line on the runway will disappear, indicating the runway is now active.
Open an ASR Display File
An ASR (Air Situation Display) file saves your display settings—including zoom level, center position, visible layers, colors, and custom views. It allows you to load a preconfigured radar screen layout instantly.
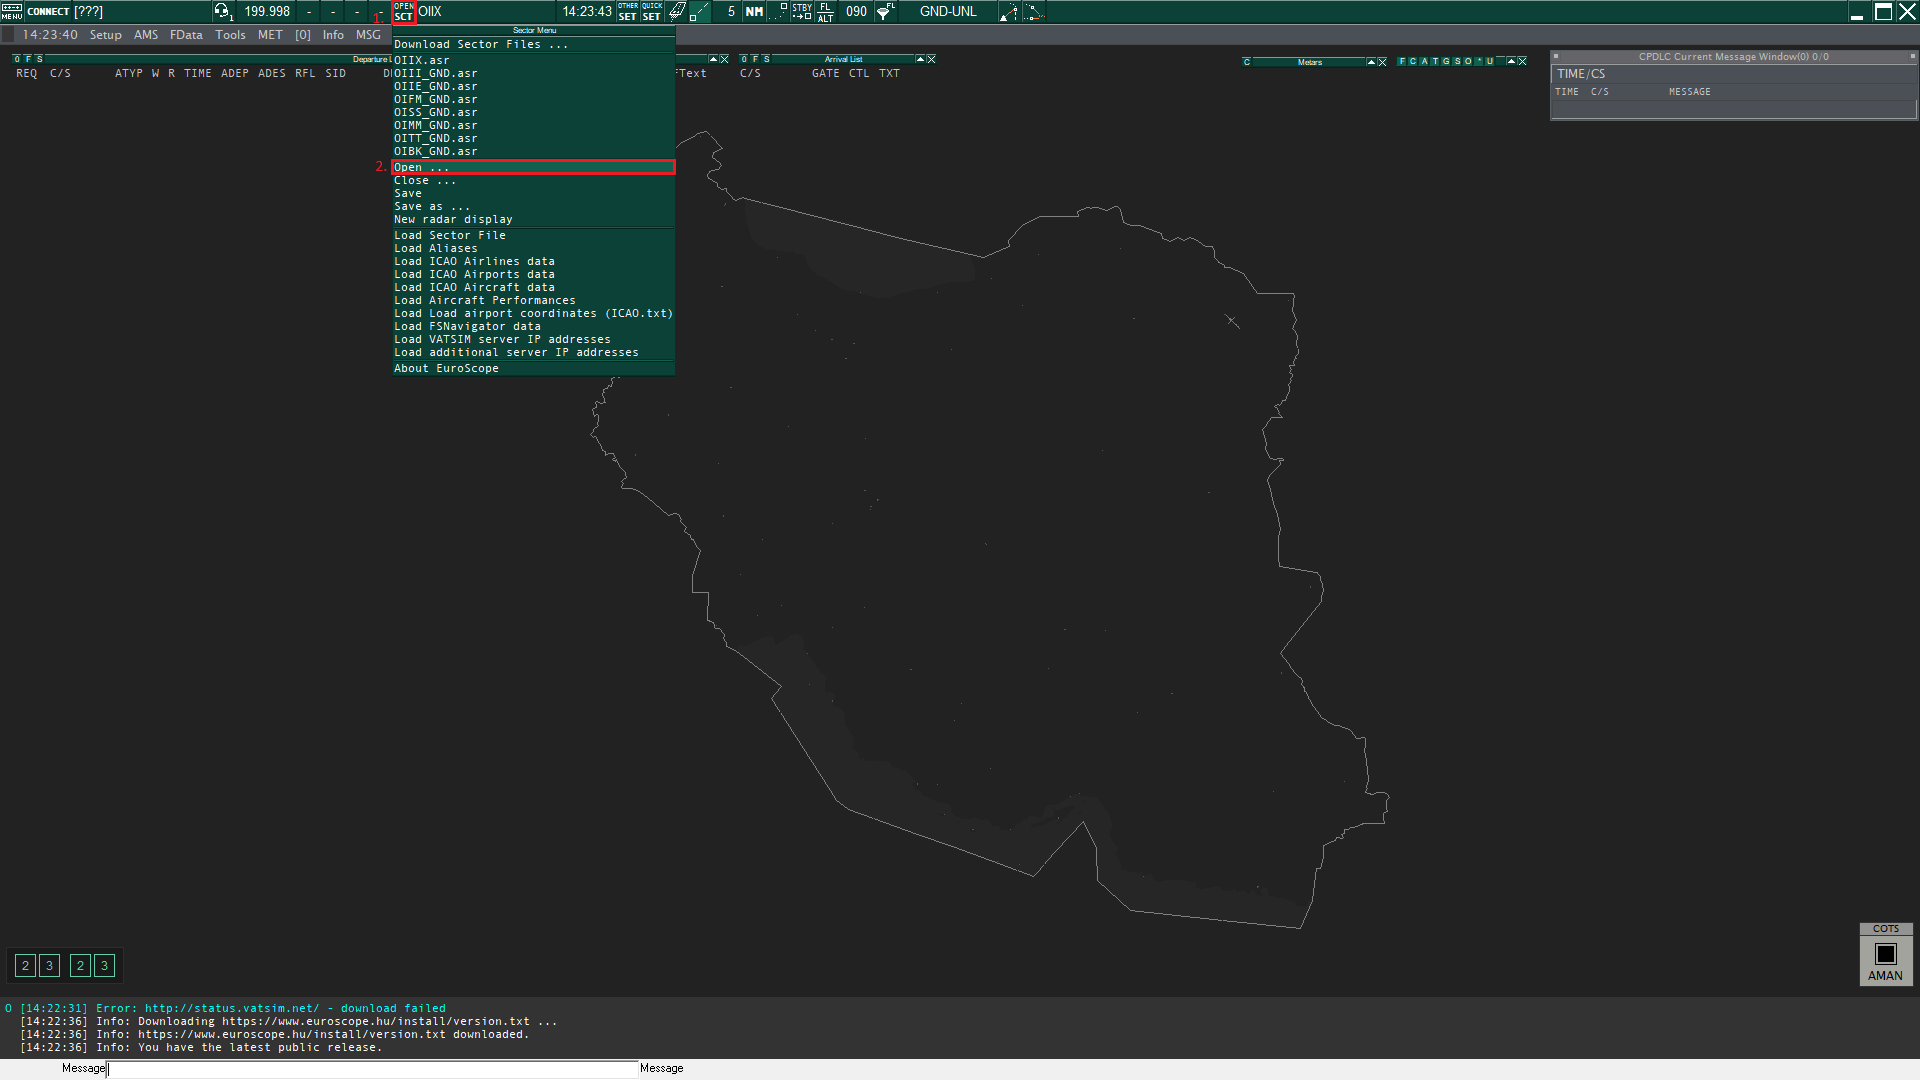
- Click OPEN SCT in the top-right corner.
- Select Open ... from the dropdown menu.
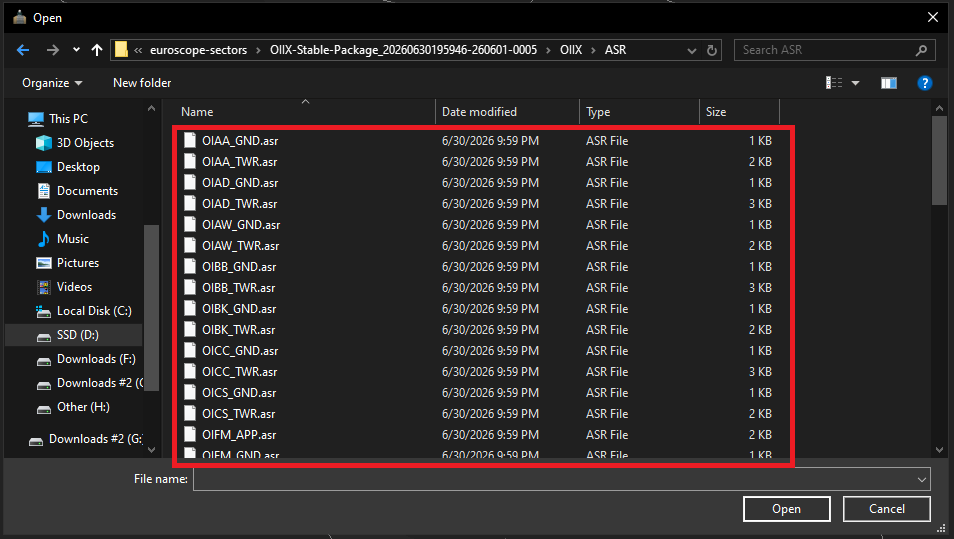
- Browse to
OIIX-Stable-Package_2026*******-*******-****/OIIX/ASR, select the desired.asrfile, and click Open. File naming convention: _GND→ Ground control_TWR→ Tower control_APP→ Approach control
Work with Departure List
The Departure List is a core tool in EuroScope that displays all aircraft scheduled to depart from your airport. It provides real-time information about each flight, including callsign, aircraft type, departure time, destination, assigned SID, runway, squawk code, and current status. This list allows controllers to efficiently manage departures by monitoring flight progress, issuing clearances, and coordinating with other positions.
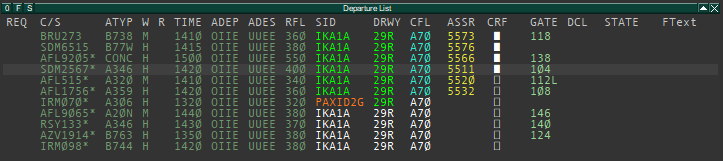
The list is interactive, each column can be clicked to perform specific actions. Left-clicking typically opens menus for editing or assigning values, while right-clicking provides additional options like toggling highlights or opening auxiliary windows.
Below is a complete reference for all columns and their click functions:
| Column | Description | Left Click | Right Click |
|---|---|---|---|
| REQ | Request status indicator | Request Menu | – |
| C/S | Aircraft callsign | Open Callsign menu | – |
| ATYP | Aircraft type (B738, A320, B77W, etc.) | – | Toggle ATYP highlight |
| W | Wake turbulence category (M = Medium, H = Heavy) | – | Toggle WTC highlight |
| R | Flight rules indicator | – | – |
| TIME | Estimated/Actual departure time | Open Time menu | – |
| ADEP | Departure airport (e.g., OIIE) | – | – |
| ADES | Destination airport (e.g., UUEE) | Open flight plan dialog box | Toggle route draw |
| RFL | Requested Flight Level | Open RFL menu | – |
| SID | Standard Instrument Departure | Set/Reset suggested SID | – |
| DRWY | Departure runway | Runway Menu | Set runway intersection |
| CFL | Cleared Flight Level | Open CFL menu | Open Vertical Aid Window |
| ASSR | Assigned SSR code (squawk) | Auto-Assign Squawk | Open ASSR menu |
| CRF | Clearance Received Flag | Set CRF and SID | Set CRF, SID and Startup state |
| GATE | Departure gate/stand | Open Stand menu | – |
| DCL | DCL Status indicator | Open DCL Window | – |
| STATE | Current ground state (CAPS) | Open Ground state menu | – |
| FText | Free text / remarks | Edit FText | – |
Using TopSky Maps (Enable: Danger, Restricted, Prohibited Area)
- Hold ALT + Right Click.
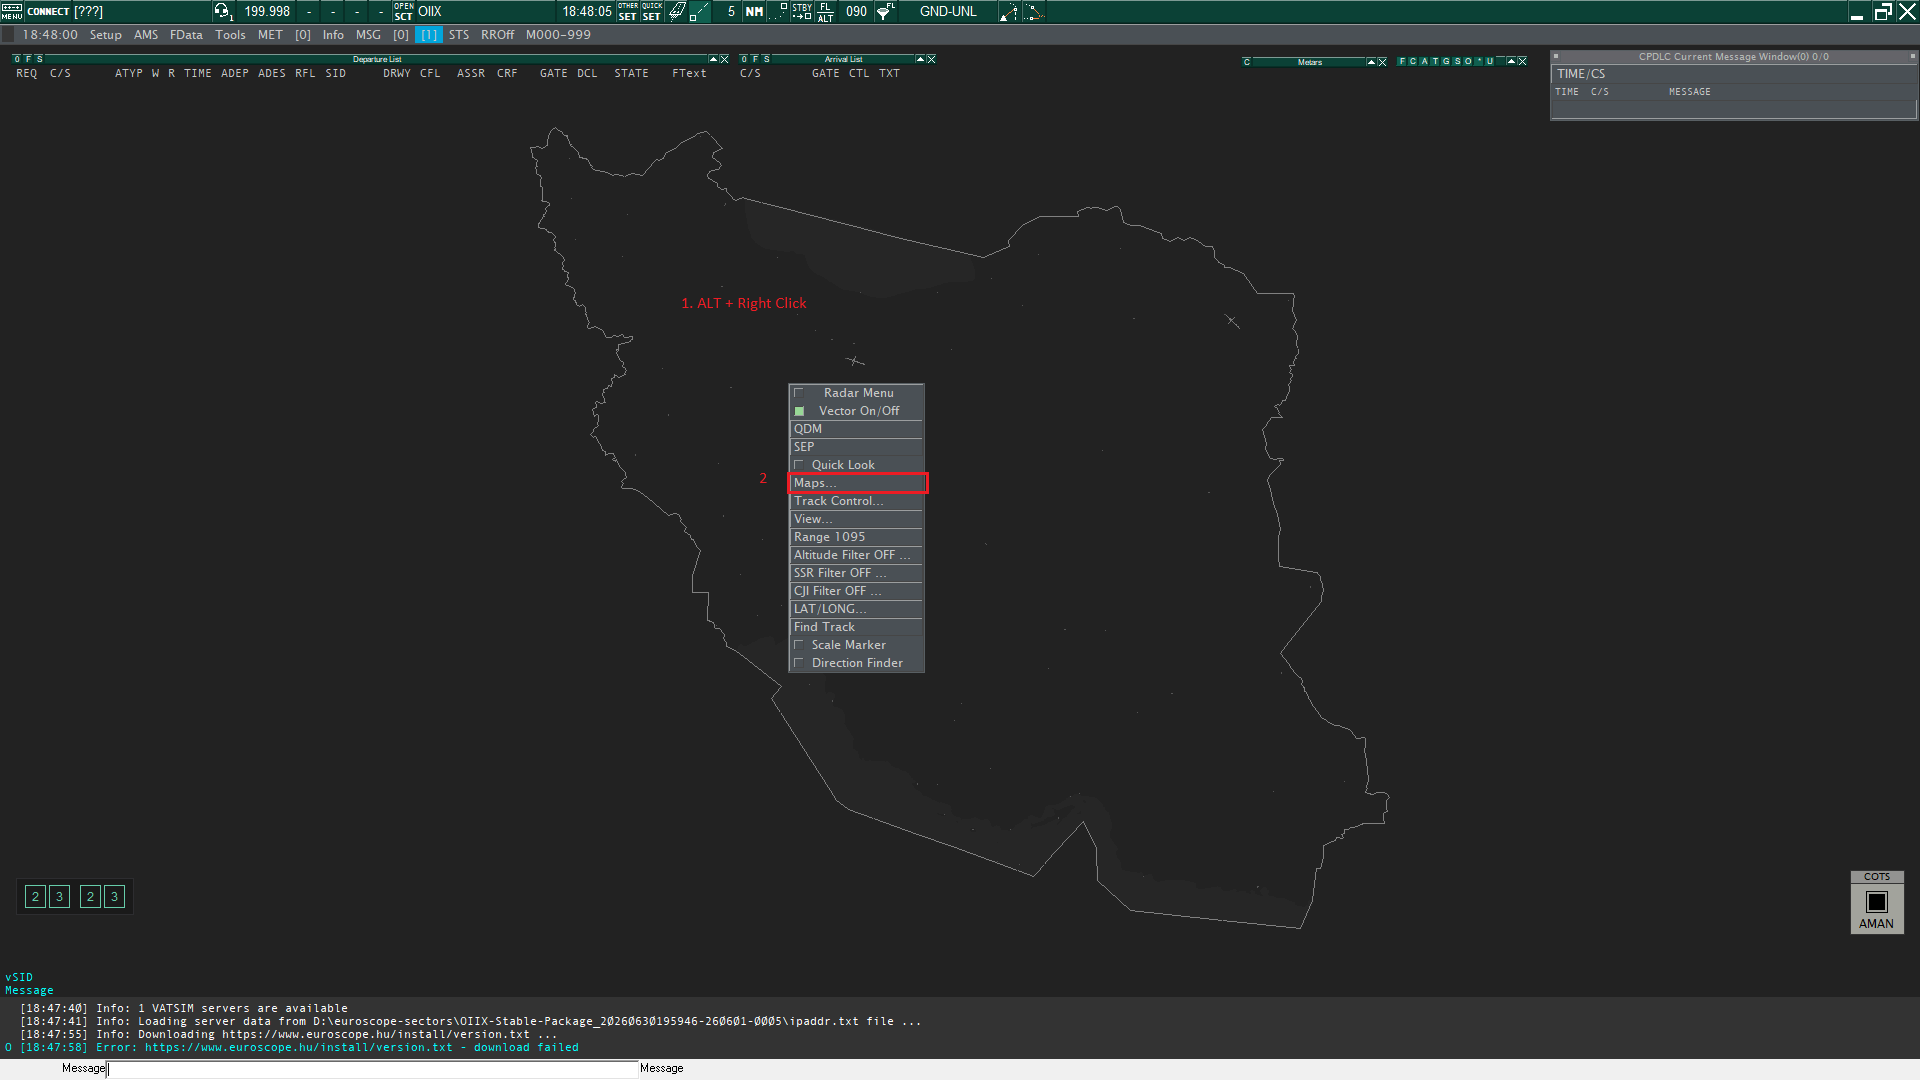
- Select
Mapson the opened menu.
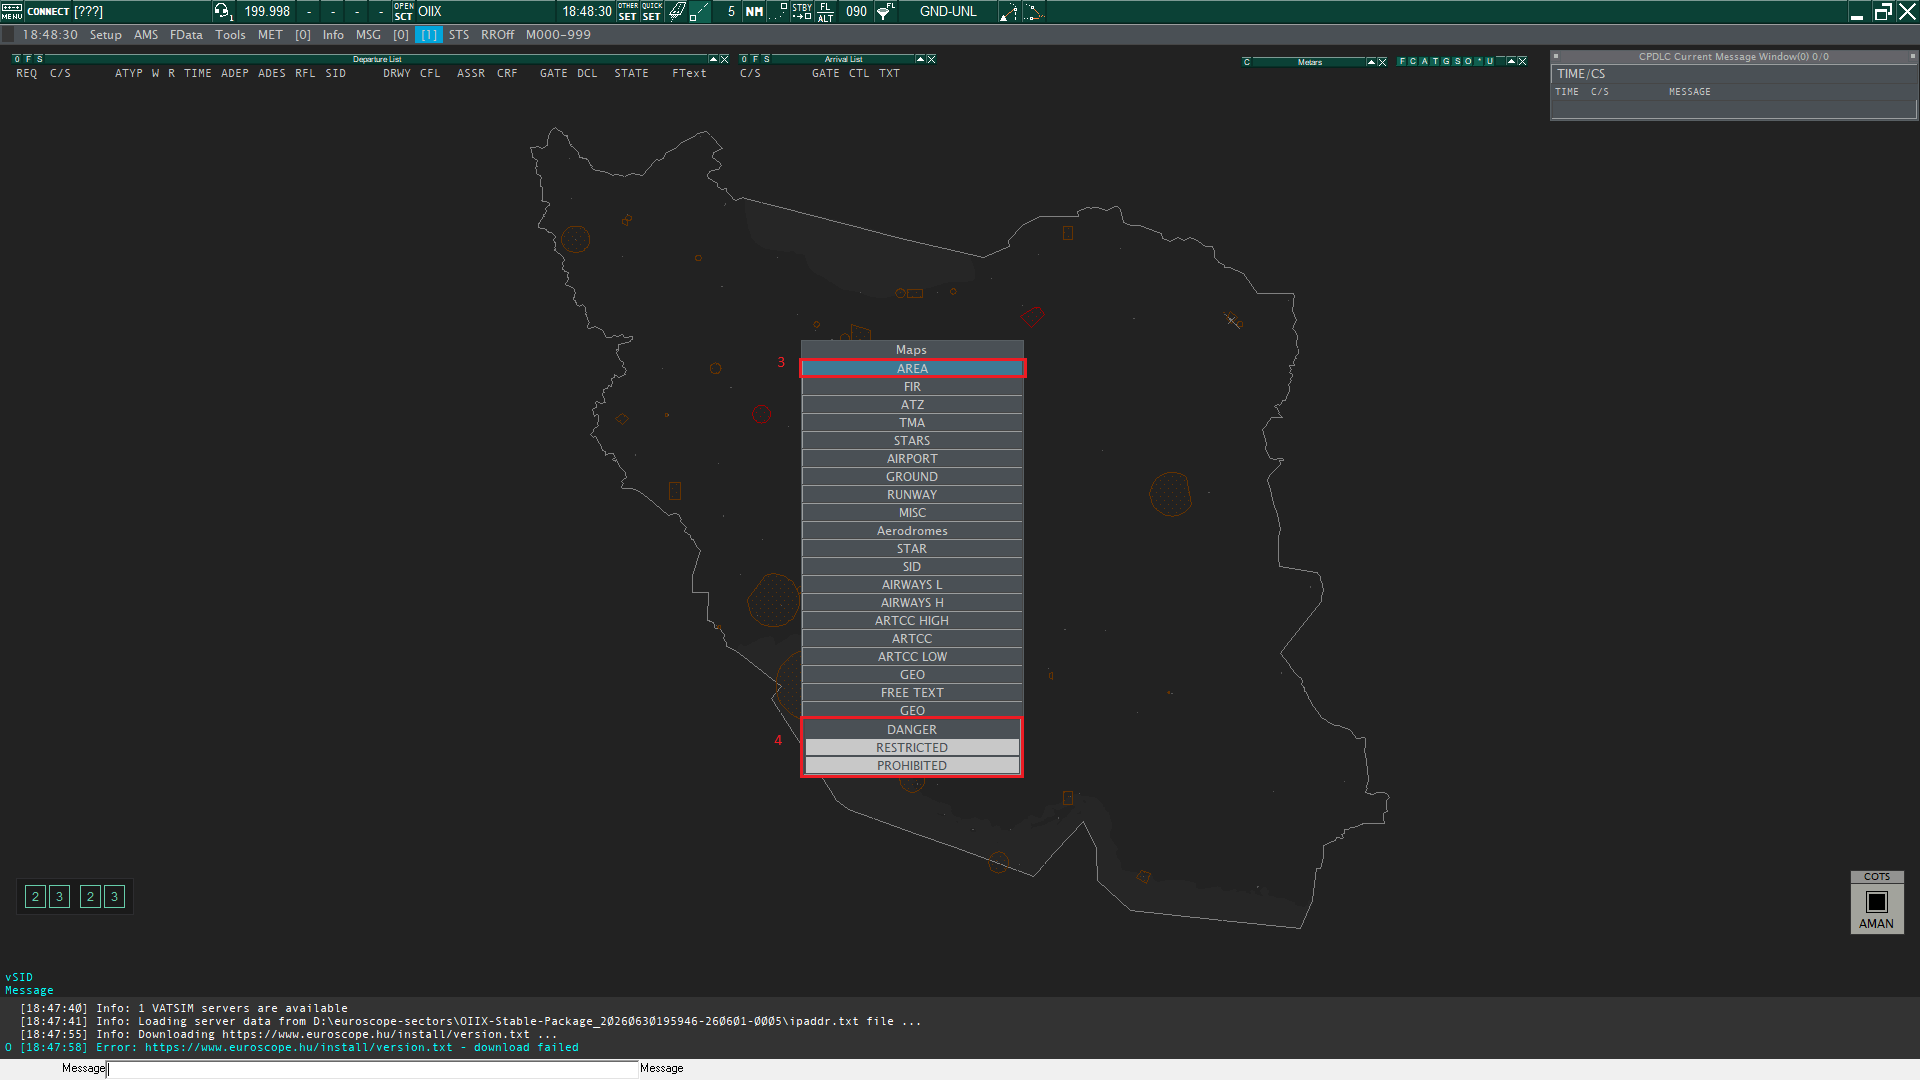
- In this menu you can enable each element (for example here i enabled restricted + prohibited area).
vSID System (Automation System)
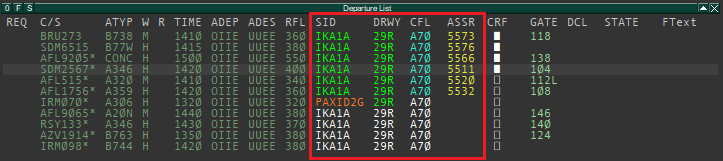
The vSID system automates departure handling by suggesting and assigning SIDs, runways, initial climb levels, and squawk codes with a single click.
⚠️ This function requires an active departure runway to be selected.
How It Works
-
One Click on SID: Simply click on the SID column in the departure list for any aircraft. This single action will:
- Assign the suggested SID
- Set the initial climb (CFL)
- Auto-assign a squawk code
-
Colors:
- White – Suggested values are ready but not yet confirmed (needs to be clicked)
- Green – All parameters are confirmed and the aircraft is ready for departure
Additional Functions
- Squawk Assignment – Left-click ASSR to auto-assign a squawk; right-click to enter one manually. Squawk codes are unique and synced across all controllers.
- Runway Intersections – Right-click DRWY to assign a runway intersection. The assigned intersection is displayed below the aircraft label on ground radar.
This automation reduces manual tasks, ensures consistency between controllers, and allows you to focus on safety, sequencing, and traffic flow.
How to Customize Your ASR Display?
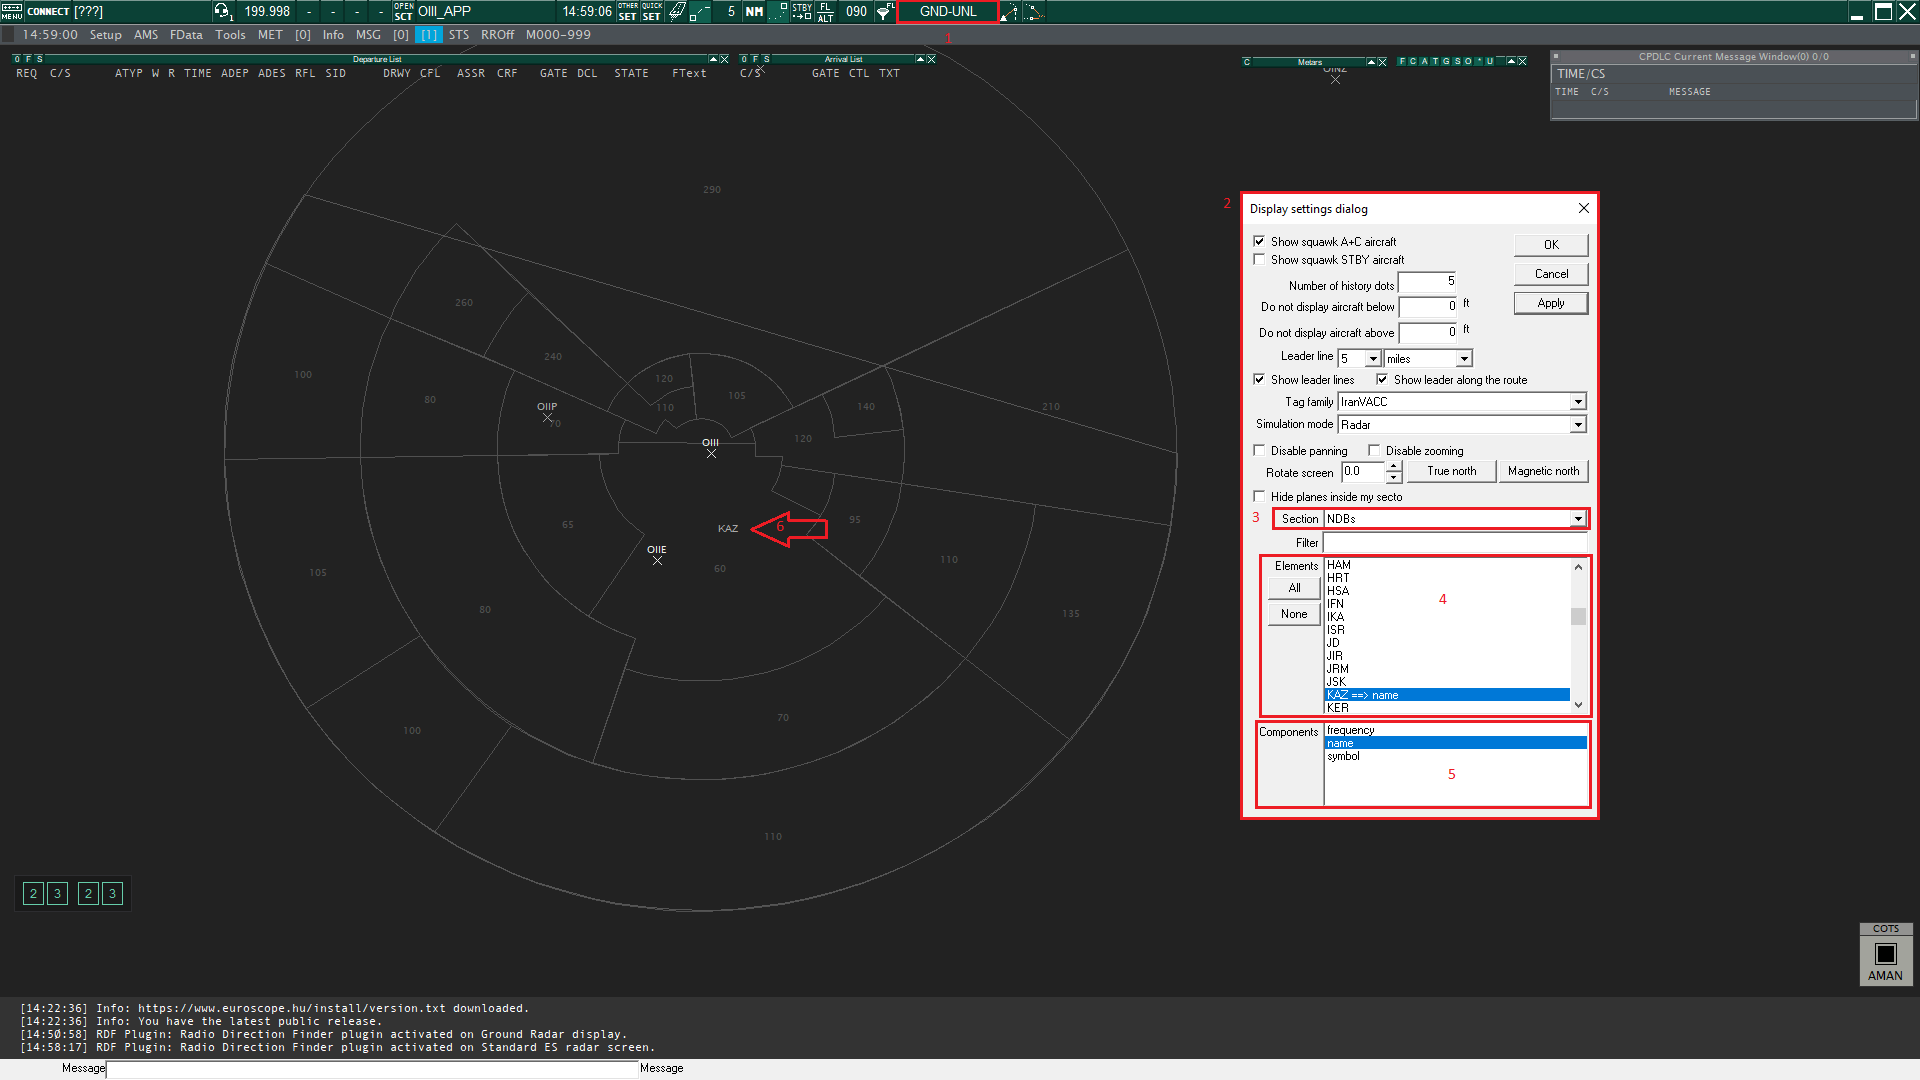
- Click GND-UNL in the top-right corner.
- This opens the display customization window.
- Use the dropdown to select the item type you want to display (e.g.,
NDB). - Select a specific element (e.g.,
KAZ– Kahrizak NDB). - Choose which component to show (e.g., the name label).
- The selected item will now appear on your radar.
- To save your changes: click OPEN SCT → Save.
Frequently Asked Questions
Not Receiving or Sending Chat Messages?
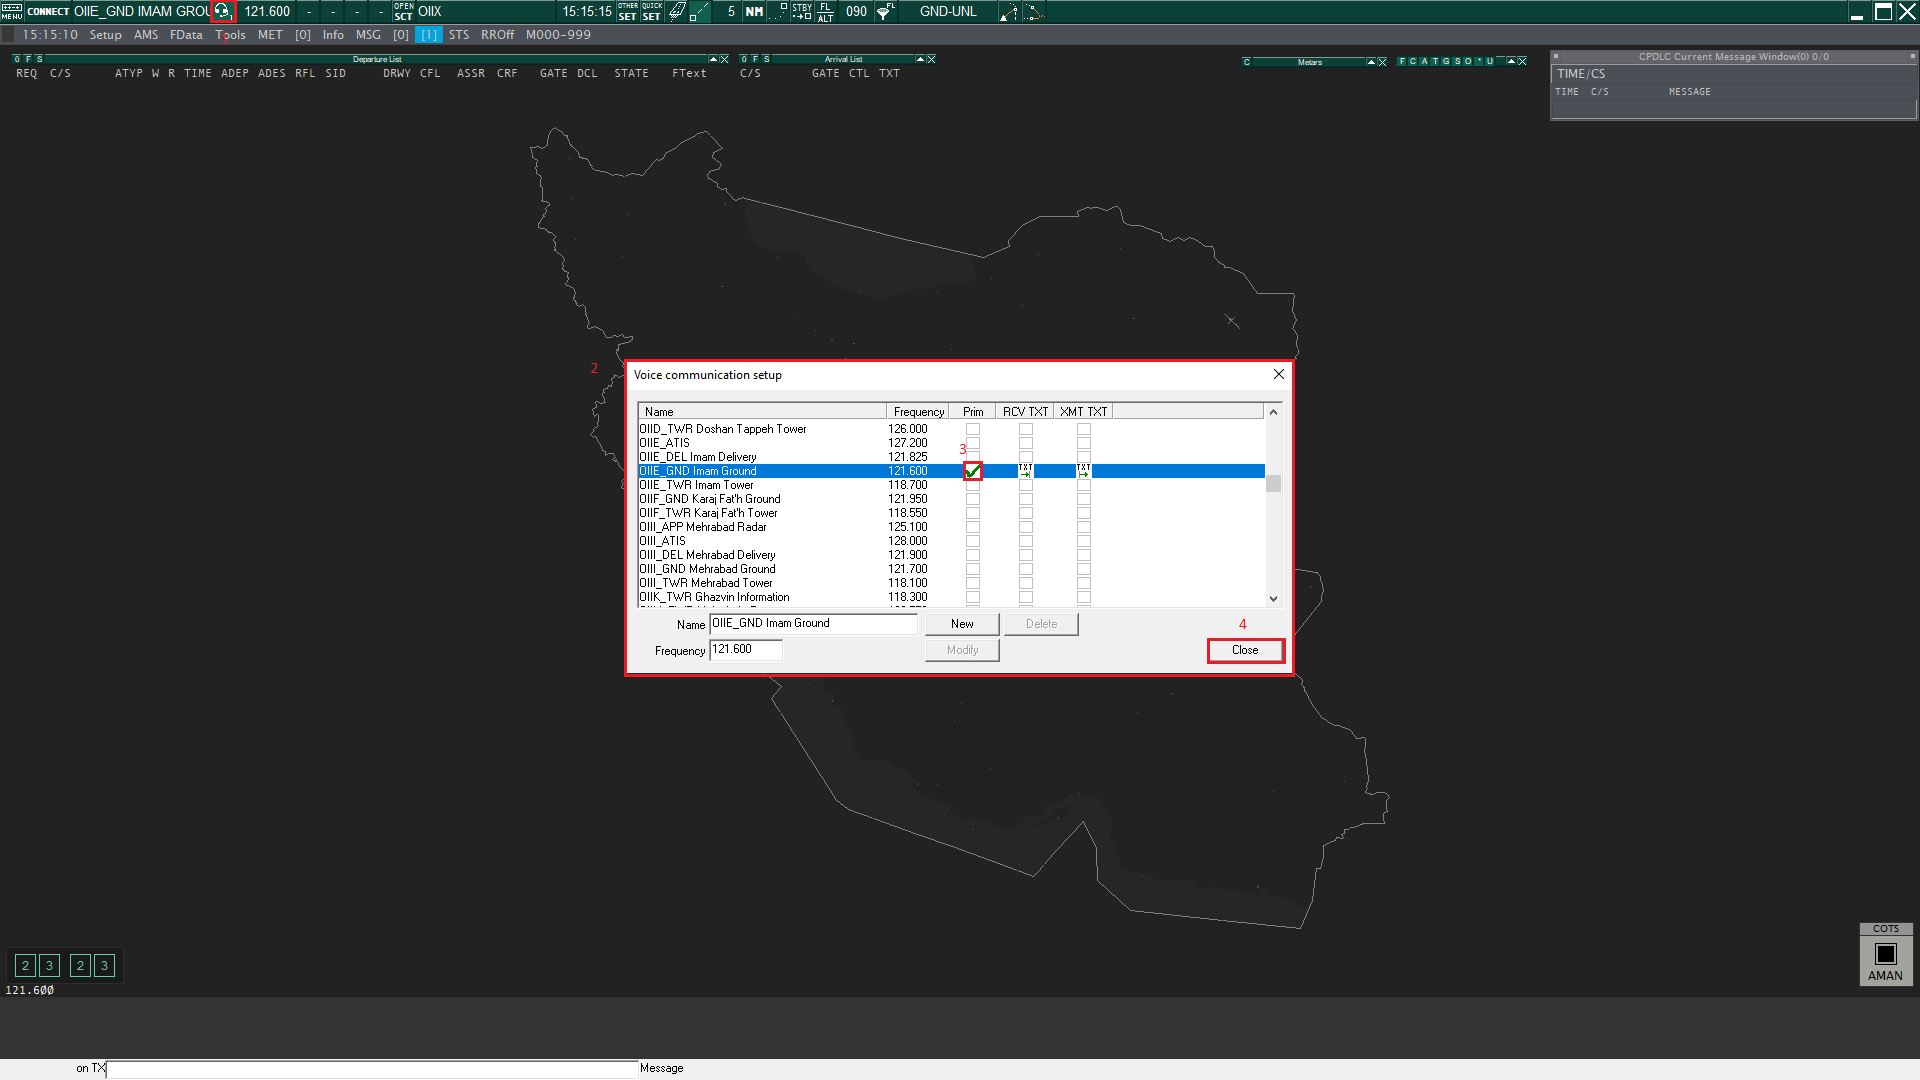
- Click the Headphone icon in the top-left corner.
- Find your station (e.g.,
OIIE_GND). - Click Primary.
- Click Close.